This weekend we embarked on one of our most exciting projects to date and this one did not disappoint. We have been slowly redoing our bedroom, look out for a post of the finished project later this week. Our last major step was our headboard. We have replaced all of the other furniture in the room or added new furniture where needed. Our headboard was the only piece that we felt was worth saving and redoing so we didn’t have to spend a couple hundred dollars on a new one that matched our bedroom set. So one night I came up with an idea, it seemed a bit difficult but we decided it could be done. After our bench spray painting success we decided to embark on another project.
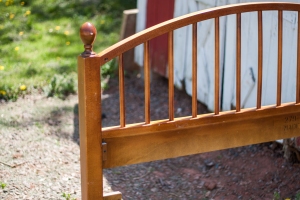
So we started with this
A plain, old wood headboard. The rest of our bedroom furniture is a black/brown color from Ikea so this was not going to do. Our walls are a lovely blue/gray color and our curtains have gray and yellow in them. So the idea I came up with was to spray paint the spindles a yellow color and then spray paint the rest of the headboard the black color. So we started off by spraying the spindles the yellow color.
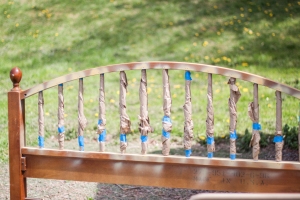
After we had them painted, Tyler taped around the tops and bottoms and then took masking paper and wrapped it around the spindles and secured it with more tape.
We then proceeded to spray paint the rest of the headboard in the black color.
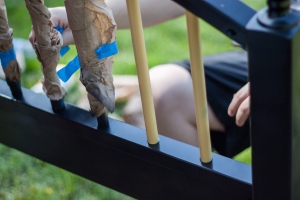
Don’t you already love the look of it? So exciting. Then we had to wait for it to dry which is always the hardest part. Once it was dry we began to carefully remove the paper and tape.
Isn’t it looking lovely? You can see a little bit of the wood but that is the back so we weren’t too worried about that.
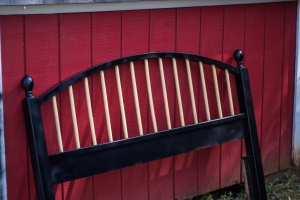
And here is the final product, isn’t it beautiful!! I am in love with this project. It has completed our bedroom and it looks so good!
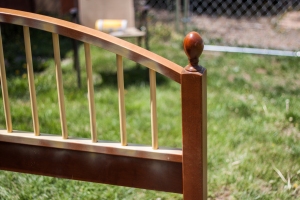
Here they are side by side, before and after of the headboard. Don’t you love the difference? Such an easy project and it made such a big difference in the room.
All we needed was 4 cans of Valspar spray paint with primer, paint tape and masking paper. A lot cheaper than buying a whole new headboard.
Have you redone anything in your house with spray paint? I love what a difference it makes!





very pretty great job
come see what I shared at http://shopannies.blogspot.com
Thank you and thanks for coming by! Hope you will follow us on Twitter or Facebook! Looking forward to checking out your blog!
You did an excellent job on the headboard, it looks gorgeous!
Thank you! I was so excited about how it turned out. Thanks for stopping by, hope you will come back!
that looks amazing! The black is so classic! I came over from Six Sisters… Hope your weekend has been great! Emily @ Nap-Time Creations
Thank you! I was so excited about how it turned out. Thank you for coming by, hope you will come back again soon.
Beautiful! I just finished my childhood twin bed for my grand-daughter to use when she sleeps over at our house. Originally, I did black lacquer spray paint. After about a month it still did not feel right, so; this last weekend, followed my gut and original thoughts…white satin finish. May need a small bit of glazing but I love how the bed has turned out. Maybe when she is older, only two now, I will go back to the black. Who knows I may get brave and use some color!
PS Found your blog via Thrifty Decor Chick’s Before and After Party.
Thank you! I’m glad you liked it and thanks for coming by. I love how easy it is to spray paint furniture and have a whole new piece practically. Hope you will come back!
Emily – great job. Pinned! Visiting from IBN
Monica
http://www.happyandblessedhome.com
Thank you Monica! We love how it turned out.
Emily
I have an old headboard in my spare room… This would be a great idea to spruce it up. Thanks for the suggestion. Pinning.
Thank you for checking it out!
Emily
I love it, Emily! What a great idea! I guess in that case I should give my hubby’s old headboard in our guest room a second chance with a make-over…thanks for the inspiration! 🙂
– Brooke –
Thanks for checking it out. It really made such a huge difference!
Emily