Everyone please give a warm welcome to Teresa as she is here today to share these beautiful DIY Repurposed Mirrors. Also please head over to her blog today to see the Repurposed Clock to Chalkboard that I am sharing over there today, it’s one of my favorite projects I’ve done!
Hi y’all! I’m Teresa and I blog over at Crafty Wife. I am so excited to be guest posting on Emily’s blog today, because I love all of her yummy recipes and DIY projects. I just wanted to say thanks for having me and reading all about one of my favorite repurpose projects I did for my Master Bedroom! Happy Friday!
A while ago I headed over to Goodwill to find some small mirrors that I could repurpose for the Master Bedroom. I was pretty excited to find exactly what I was looking for, but their original design left something to be desired. I wanted beach themed mirrors and I was just not feeling the red color or the design on them.
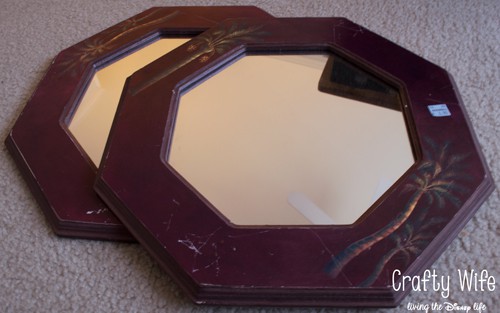
I sat on the mirrors for a long time because I had no idea what I wanted to do with them. It wasn’t until Chris and I decided on a color scheme for the bedroom that the vision for how I wanted the mirrors to look came to me.
I wanted a weathered look to them because I always think of cracked paint when I think of a beach house and I want our bedroom to have that feel. I had already done a similar technique on a picture frame so I knew that was the direction I wanted to go for the mirrors.
I used:
- Rustoleum Spray Paint Primer, White
- 200 grit sandpaper
- Martha Stewart Crackle (weathered and fine)
- Martha Stewart multi-surface Satin acrylic craft paint, White
- Martha Stewart multi-surface High Gloss acrylic paint, Grey Wolf
- Martha Stewart Gloss
- All Natural Cotton Rope

First, I sanded the mirrors to get rid of that awful red paint. I did this a few times because I’ve never spray painted before and wanted to make sure I got enough of the red off the frames so it wouldn’t bleed through the spray paint.
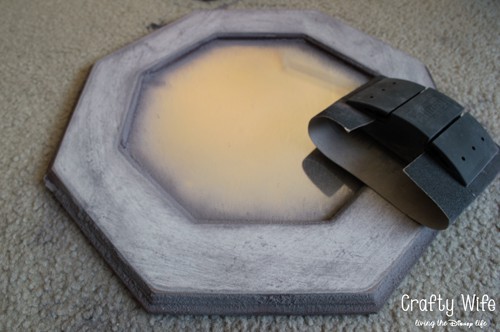
I did three coats of primer (waiting 10 minutes in between each coat) to cover the red. I was a little worried at first because little bits of red paint bleed through and I didn’t know if that was normal. But, once the last coat of primer was dry I sanded down the rough spots and the last of the red disappeared (much to my relief!).
In this picture, you can see little streaks of red seeping through the layer of primer. Two more coats got rid of it altogether!
Here’s where things changed a bit.
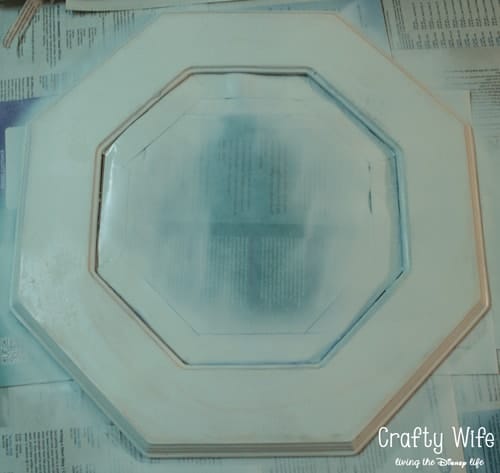
I decided I wanted to try two different techniques on the mirrors. On the first mirror, I painted the base coat white and waited 24 hours to let it dry. Once it was dry I applied the fine crackle (very liberally) all over the frame and let it sit for about half an hour. Once I was sure that was dry I mixed the Grey Wolf acrylic paint and the Gloss (about half and half) and used a sponge to apply it to the frame. By mixing the same amount of gloss and acrylic paint, it gave the top coat a very transparent look. Since I followed the directions on the back of the gloss bottle, I wiped the gloss/acrylic paint combo off the frame pretty quickly instead of letting it sit. The final result of this mirror looks like the frame is a bit dirty.
On the second mirror, I painted the base coat with the Grey Wolf acrylic paint (this is the same technique I used for my picture frame). After 24 hours, I applied a good mix of the fine and weathered crackle all over the frame. I was hoping this would give it a unique crackle affect once everything was said and done. After the crackle layer dried I mixed together about three tablespoons of white acrylic paint to one teaspoon of the gloss. By doing this, I had more of a solid white color going on as the top coat instead of a transparent one. This time, I left the top coat on and just let it dry to see how it came out. I finally had my crackle! But, I wasn’t entirely happy with the effect so I added another layer of crackle and another layer of the top coat. I did this twice. However, each time I added another white top coat I added less white paint and more gloss to get a more transparent look. I didn’t want the white top coat to overwhelm the frame. This is a close-up of how it came out.
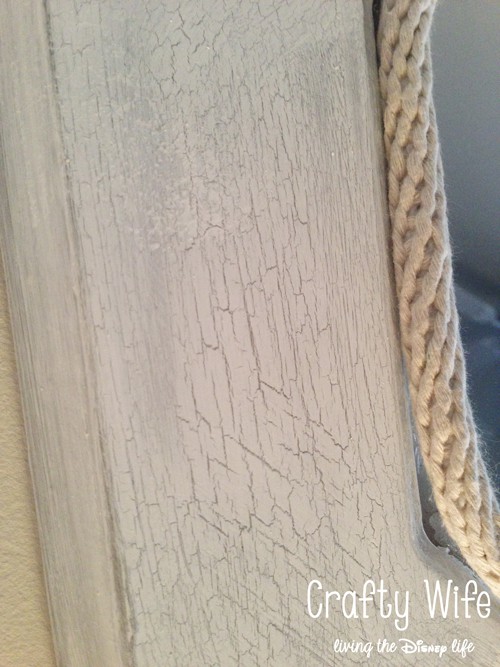
Doesn’t it look like an old piece of furniture you’d find on the beach? I think so!
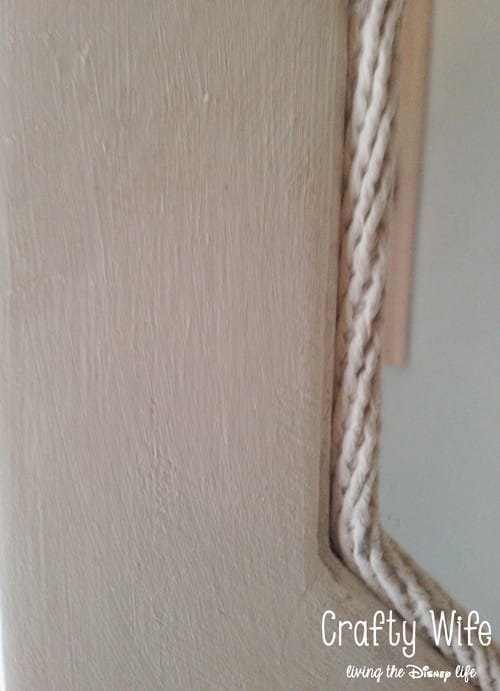
To give it more of a nautical look, I decided to add rope around the inside of the frame. And once that was done I hung them in our bedroom.
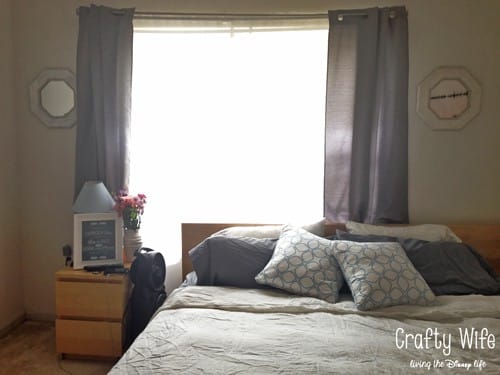
I love that they reflect light which makes our bedroom much brighter during the day. And I love the look of them next to our windows. I definitely think I like the second technique better and may eventually re-do the first mirror. But for now, they look good! My master bedroom is starting to come together, and I couldn’t be more excited about it!

Really cute! Thanks so much for showing how it’s done!