Looking to update your kitchen or bathroom? Our guide for How to: Paint Cabinets is a great starting point for your home remodel.
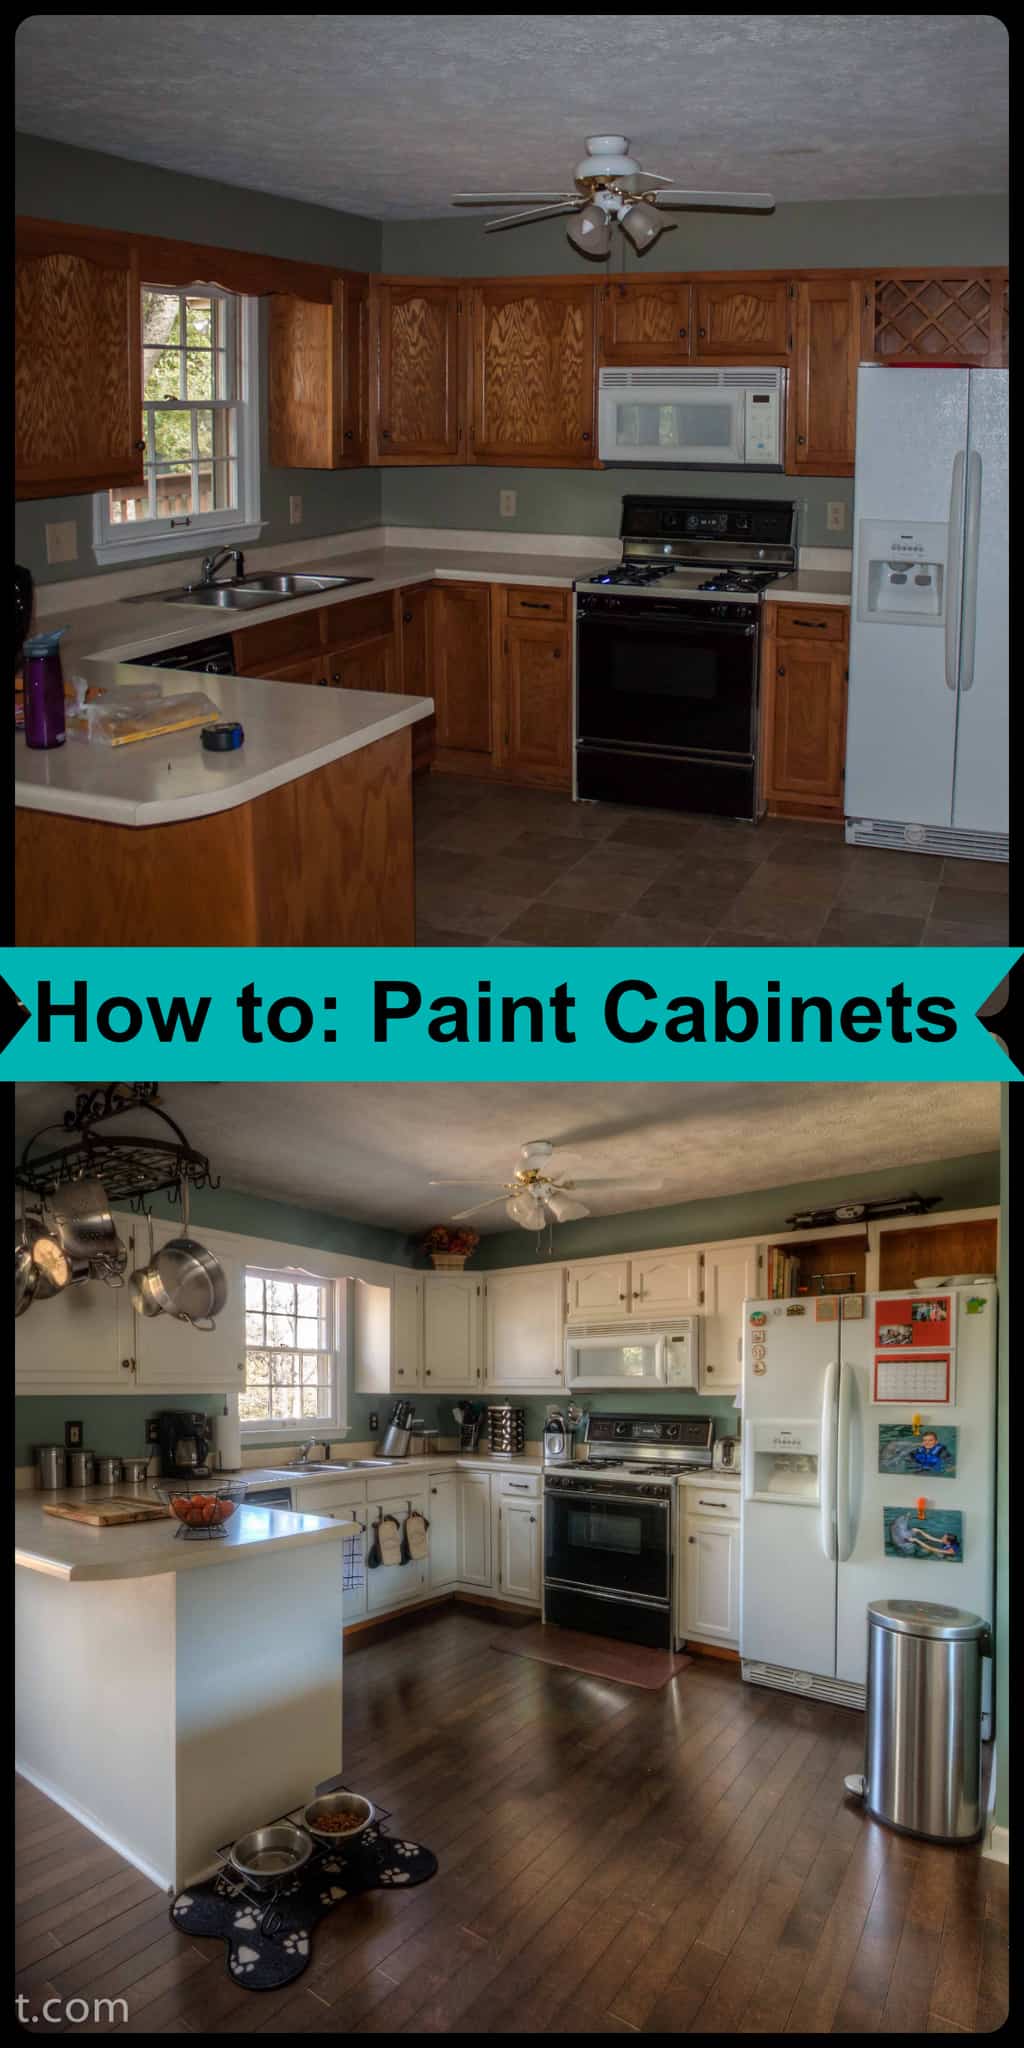
This process is no joke and is not for the faint of heart. Oops did I scare you off now? With that being said the results, for us, turned out amazing so it was completely worth all of the sweat and tears. I am going to share with you today how we painted our kitchen cabinets. Disclaimer: This is what worked for us, make sure to take all proper precautions and be prepared if trying to do this for yourself. What worked for us may not work for you.
When we bought this house we were really wanting to paint the kitchen cabinets. I just wasn’t loving the outdated oak and was leaning towards white cabinets. After a lot of thought we finally decided if we were ever going to go for it then now would be the time when everything was being done and before we moved in the house. So one day I headed over to the house and got to work. This is what I started with in the kitchen.

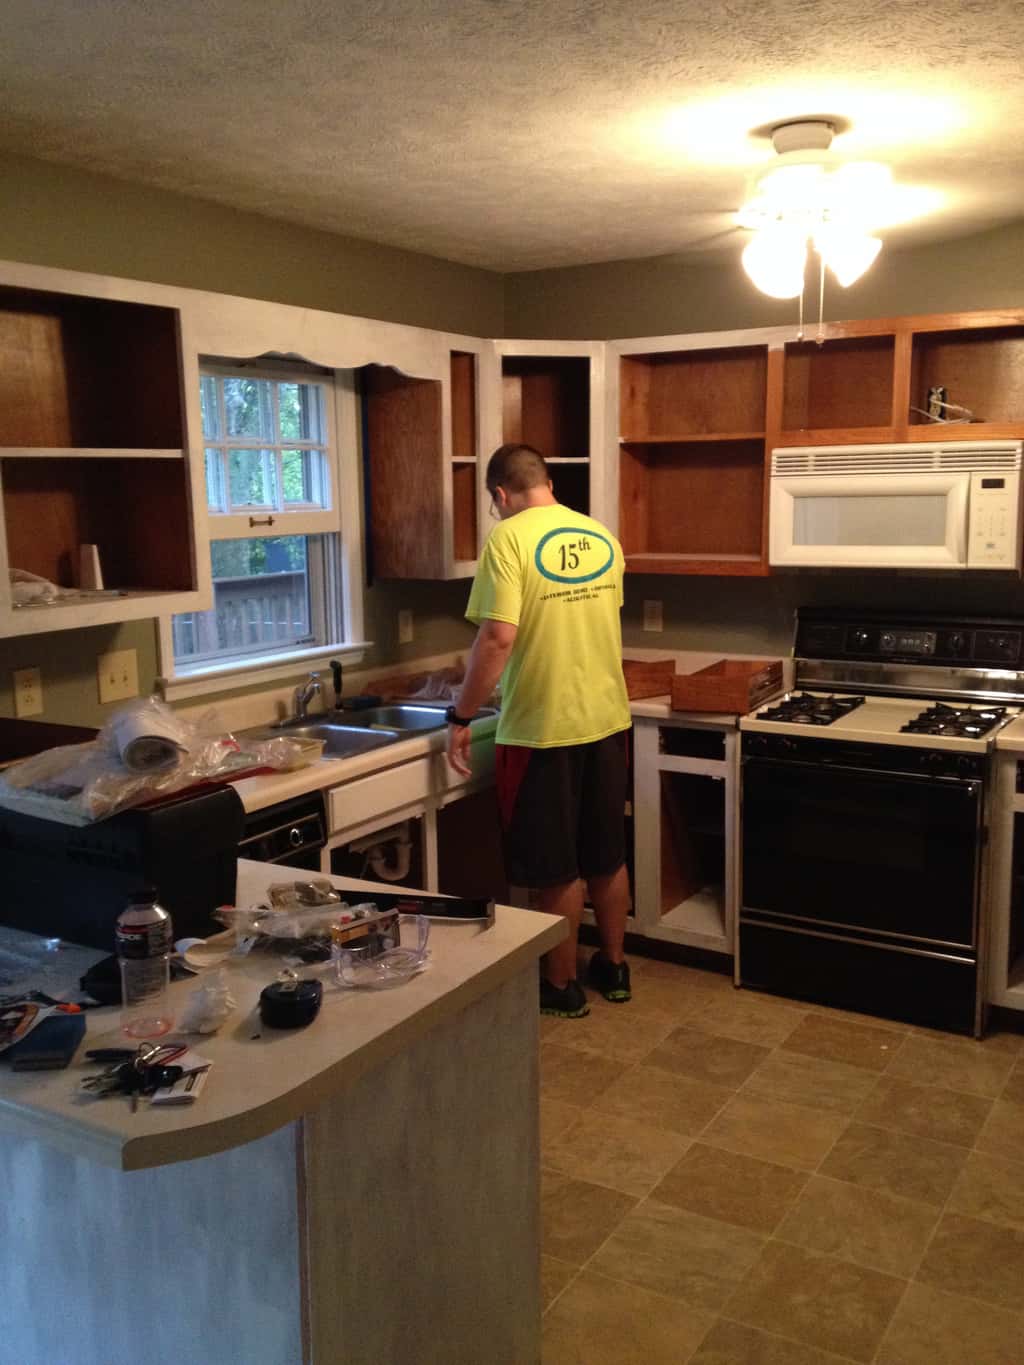
Step 1: Remove all cabinet doors and hardware
I highly recommend getting ziplock bags, labeling them and placing your hardware inside of them. I did this to the extreme, I had bags for upper outside screws, lower hinges, etc. You get the picture. I also recommend a power drill verses a screw driver. About halfway through I switched to a power drill and the process went much faster.
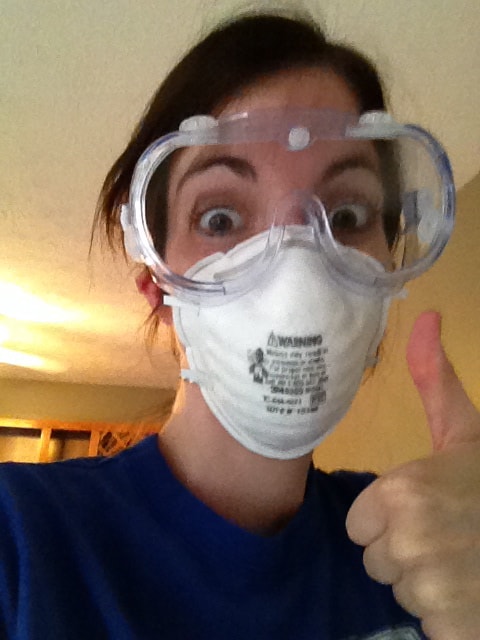
Step 2: Clean the cabinet doors and the frame
We used TSP from the hardware store. This stuff is intense so make sure you follow the directions and wear gloves, goggles and a mask. I’m pretty sure my new neighbors thought I was crazy sitting in my garage decked out with all the safety gear as I wiped down cabinet doors. But hey, you can’t be too safe right? After you finish this step let the cabinets dry completely before moving on to the next step.
Step 3: Sanding time
I loathe sanding. The sound of it just gives me the heeby jeebies. It was made a lot easier when we borrowed my brother-in-laws electric sander, everyone should own one of those babies. We still had to use sanding sponges for the corners and edges but it made it a good bit easier.
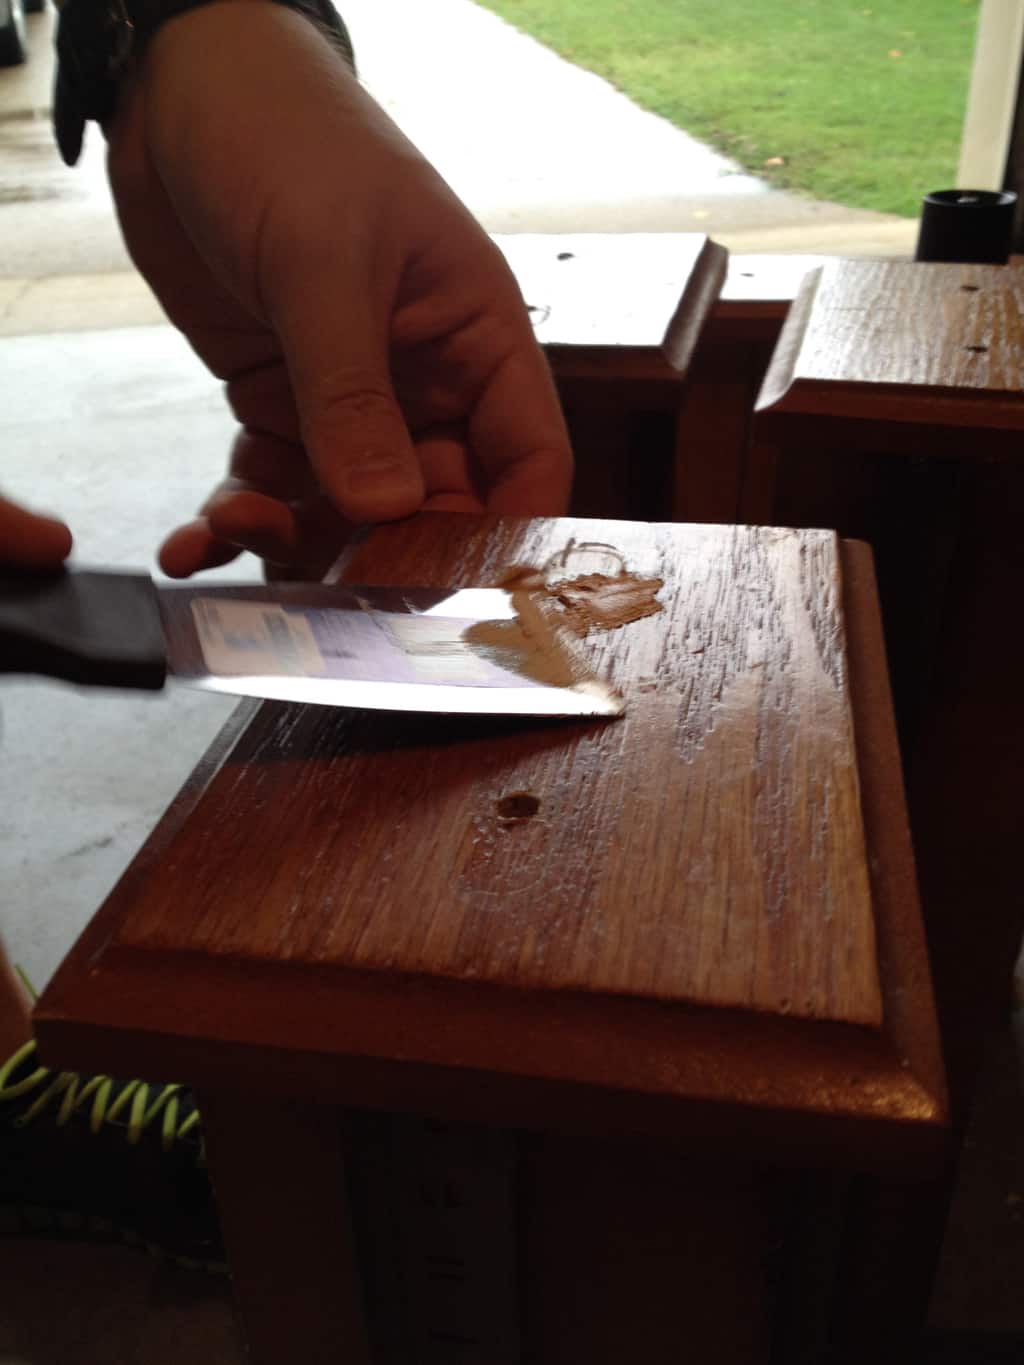
For our oak cabinets just a light sanding was required. After you finish sanding, wipe down the cabinets and then let them dry. If you plan to replace your hardware be sure to wood putty over the holes and sand it down before adding the primer. We did this for the bathroom but not for the kitchen cabinets.
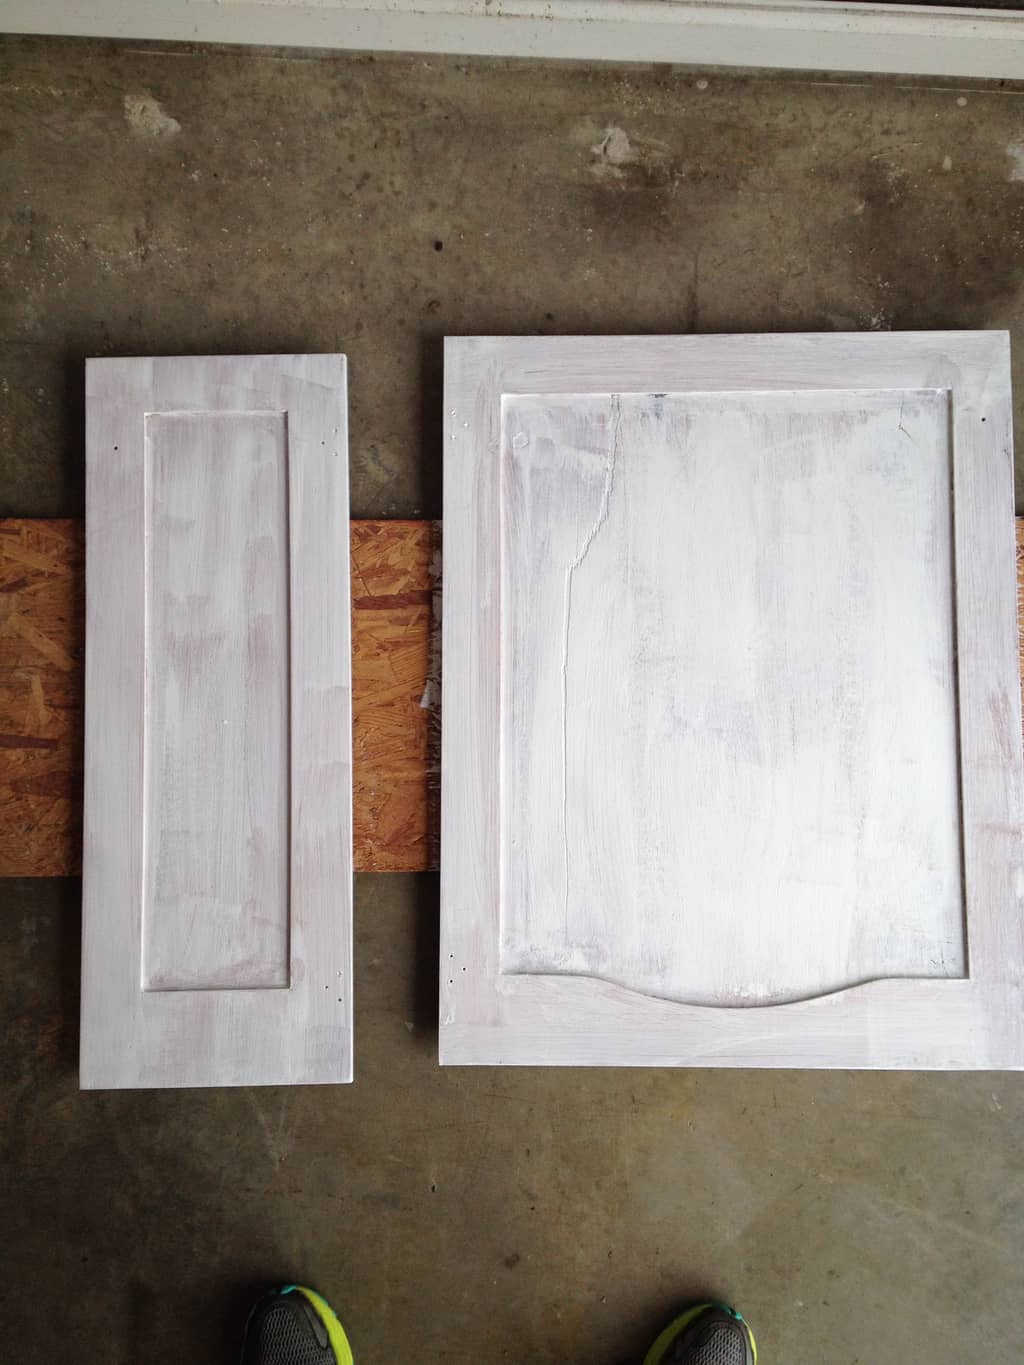
Step 4: Primer!
We read somewhere that we needed to get a wood grain filler primer. Well we couldn’t find that in stores anywhere so we just went with a primer that said it would cover the wood grain and it worked for us. We got started priming all of the cabinet doors and the frame. We ended up with 2-3 coats of primer on the doors and frame just depending on how they looked. I did less coats on the backs of the doors because they weren’t as important to me.
This took awhile. We set the doors up on boards on sawhorses in the garage. We primed one side, let it dry and did it again then let it completely dry before we flipped it over to do the opposite side. Be careful of drips because you’ll flip the door over and find huge globs on the other side.
Step 5: Sand again!
After priming and priming then it’s time to sand again. Sand down any drips or globs you might have missed and get it really smooth in preparation for the paint. You don’t want these things to show through when you paint the cabinets. After sanding then you need to wipe down the doors again and let them dry off completely.
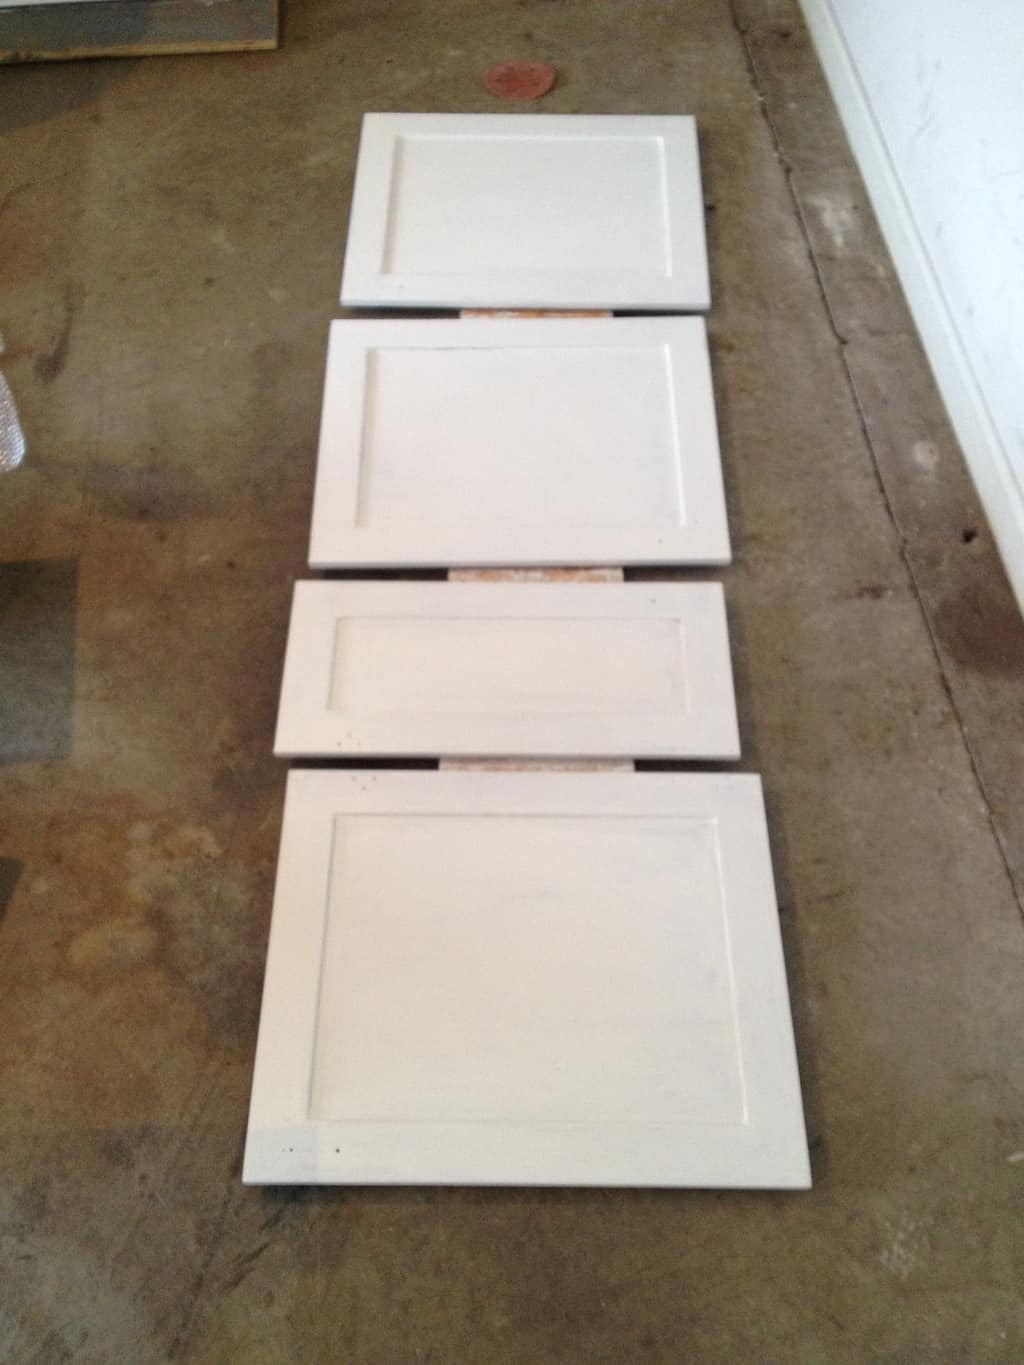
Step 6: Paint!
Finally! It’s time to add your paint of choice to your cabinets and frame. You want to make sure you have somewhere to lay the doors when they are drying. Those little clear storage boxes are the perfect size to lay the cabinet doors on, you can pick those up for a dollar at the dollar store if you don’t have any or something of similar size.
For the paint for the cabinets we used Benjamin Moore Satin Impervo paint in Sailcloth. We chose this paint because it was the same paint my dad had used at our old house and the type paint that was recommended to him as the best for cabinets.
Step 7: Finishing the cabinets.
Let the cabinets completely dry before you attempt to put them back up, they should dry for at least 24 hours to 3 days. We hung ours up after about 24 hours because we weren’t going to be using our kitchen for a couple weeks. But if you are going to be in your kitchen let them dry and solidify for at least 3 days where they wont get banged or scratched. You don’t want to put in all that hard work and then mess up your cabinets.

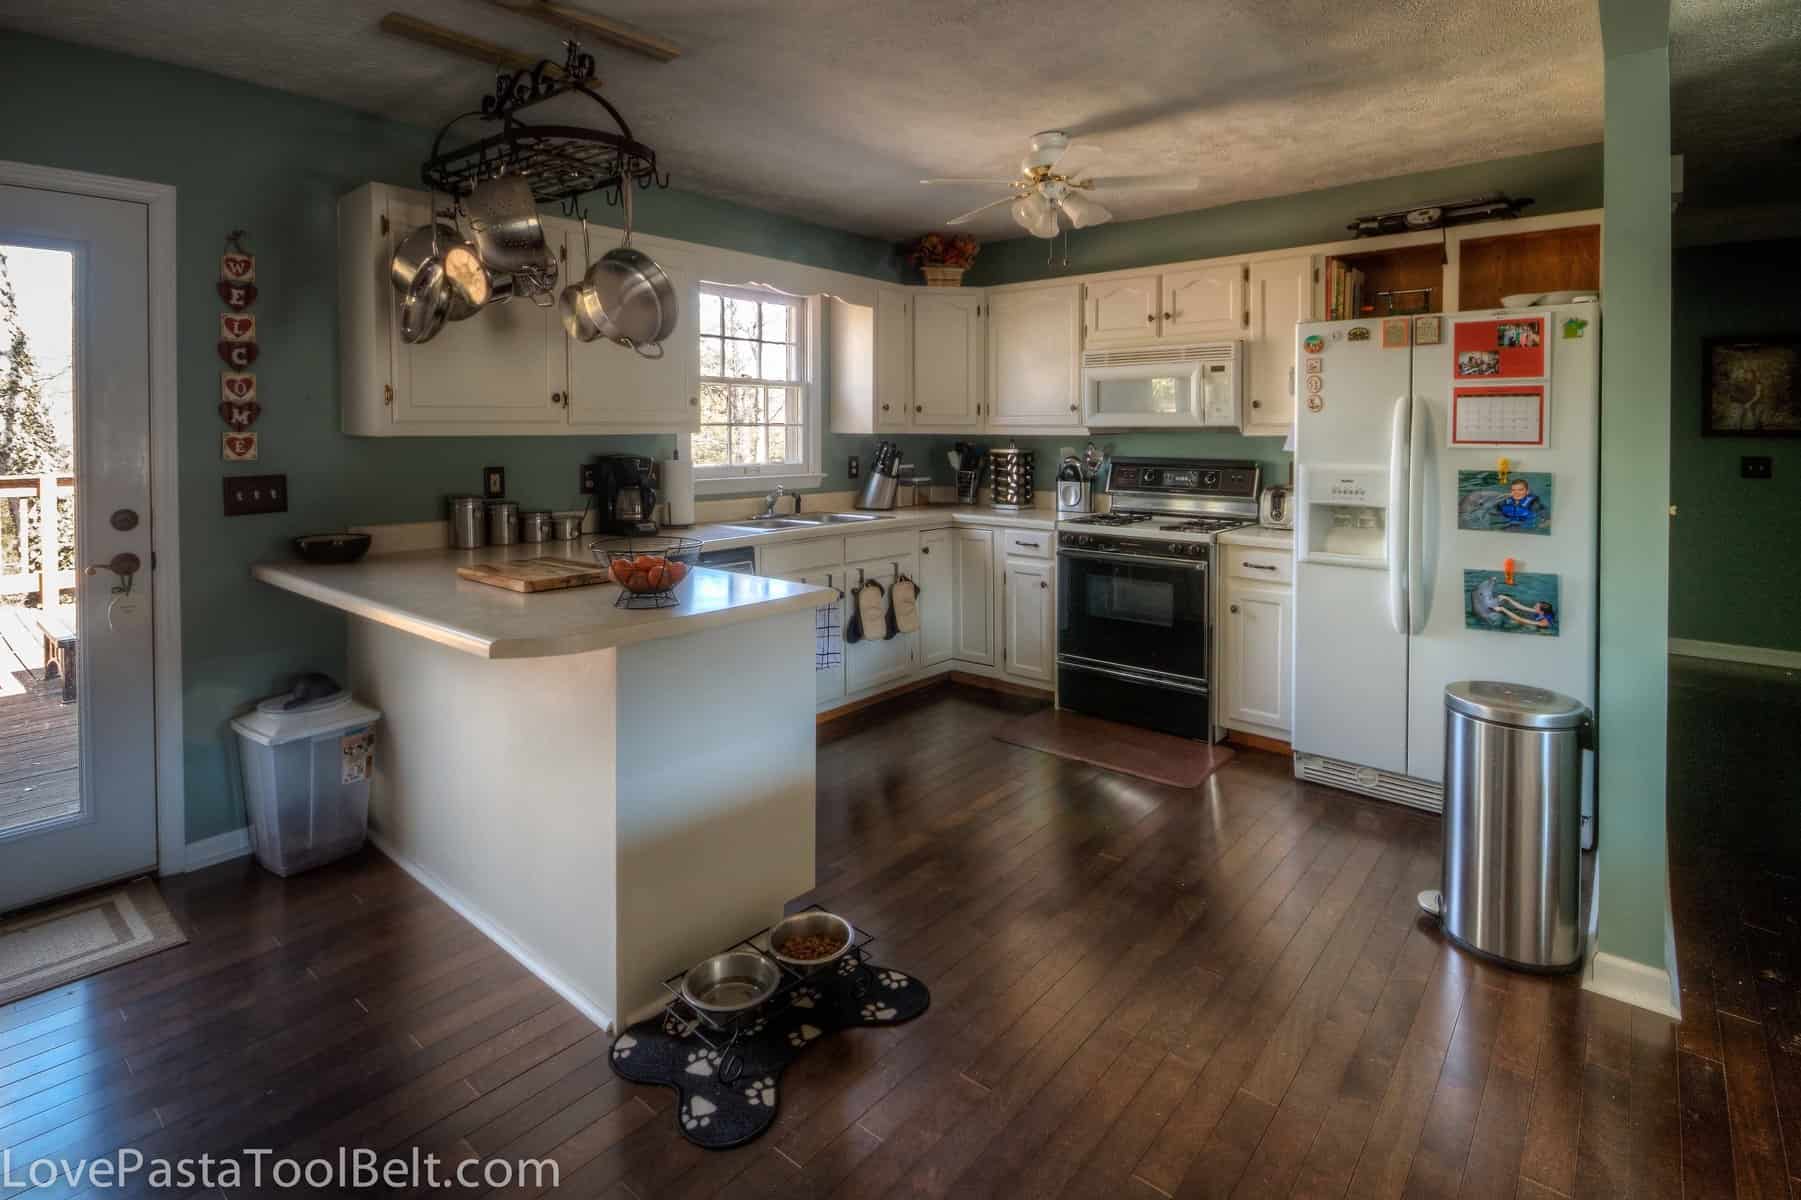
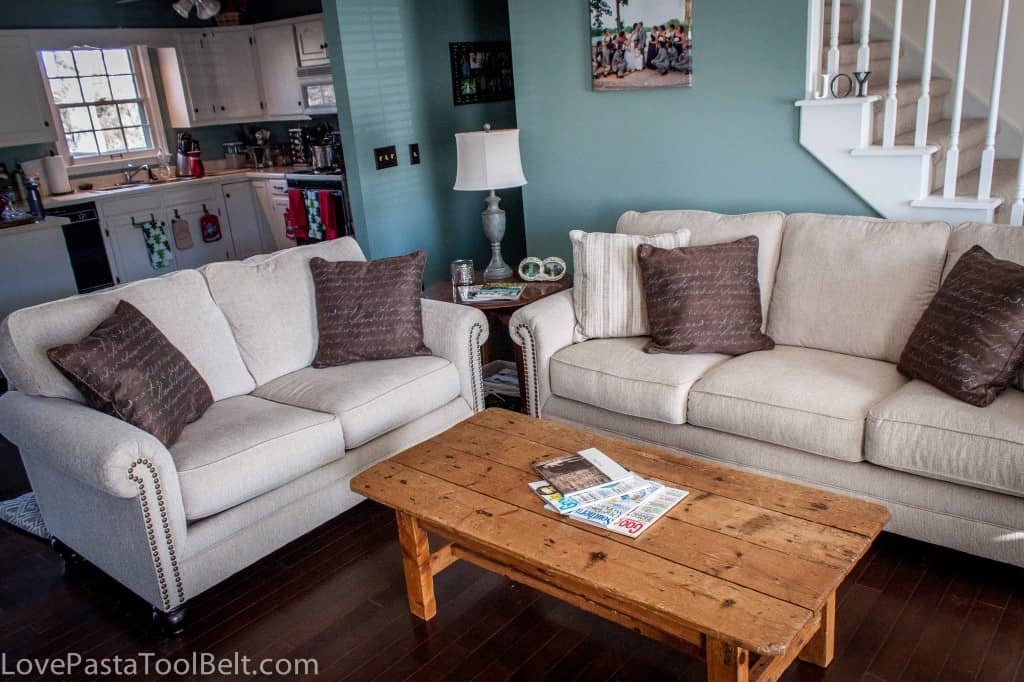
And that is the process of How to: Paint Cabinets. It was a lot of work but we absolutely love the outcome! It has really updated our kitchen and lightened it up. I can’t wait to change the countertops and add a pretty backsplash!
Be sure to check out our other home improvement posts!
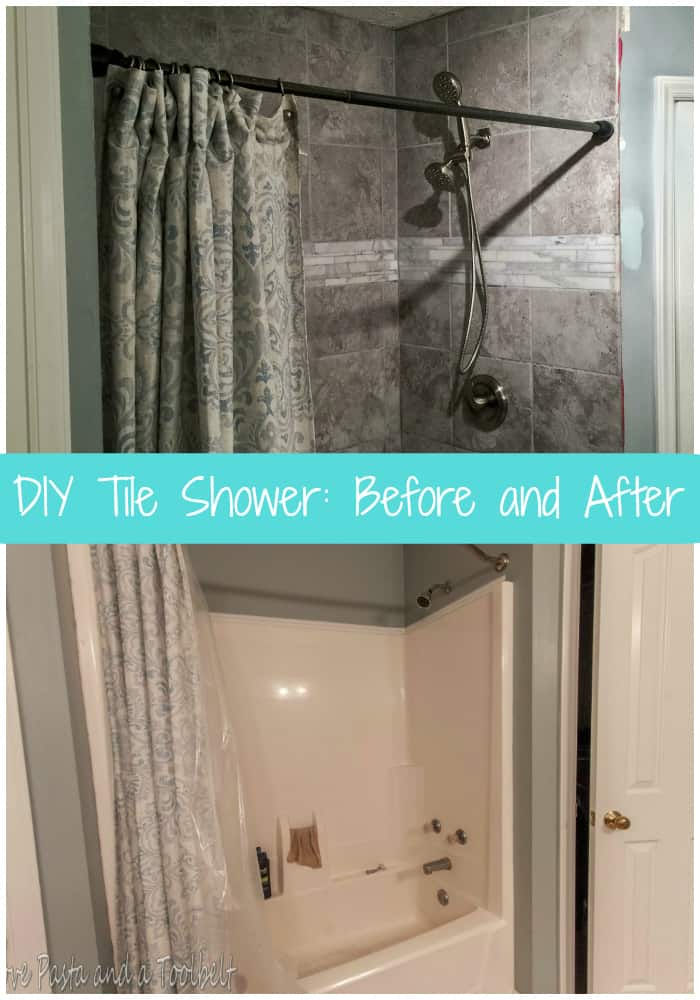
DIY Tile Shower: Before and After
Kitchen Reveal: Before and After

Living Room Reveal: Before and After

I’ve never painted cabinets before, so this is good to know. =0)
I love the difference it can make in a room!
Emily
You did a wonderful job! Your cabinets looks great. If we ever decide to paint our cabinets I’ll be coming back to this.
Thank you! Good luck if you do!
Emily
My aunt redesigned her kitchen and painted her cabinets. I must say that it was a lot of work but it looks fantastic. You guys did such a great job.
Thank you!!
Emily
A lot of elbow grease, but it looks nice! We’re fortunate to have nice cabinets already, but the carpet is another story!
Thank you! Yes it was a lot of work but we love the outcome.
Emily
Not sure if I missed it, but did you only need to apply 1 coat of your color after the priming & sanding? I’m going to paint my wood cabinets, which look like the same style as yours,, but leaning toward having them spray painted by a professional. You did a wonderful job & they look great, just not sure I’m up for it. Thanks.
I think we did 2 coats. We let the first coat dry and then kind of observed them in the lighting of the room and decided whether or not a second coat was necessary. Good luck with your kitchen!
Emily
Emily! I love this transformation and the colors that you created in your kitchen! It looks so great! Thanks so much for linking up to Wine’d down Wednesday! Good stuff 🙂
Cathy
Thank you so much Cathy!
Emily
I love the end result. Could you estimate about how many days this project took. Just trying to figure out how much time to block off.
I kind of spread it out because we had time. Looking at all of the steps I would probably allow two weeks because you have to add in days for drying and such. It just depends on how long primer takes to dry. It can be a time consuming project but it’s so worth the end result!
Emily
How are your cabinets looking 2 years later?
Hi Marg,
They are looking great! My dad was actually just here the other week and commenting on how well they look.
Emily