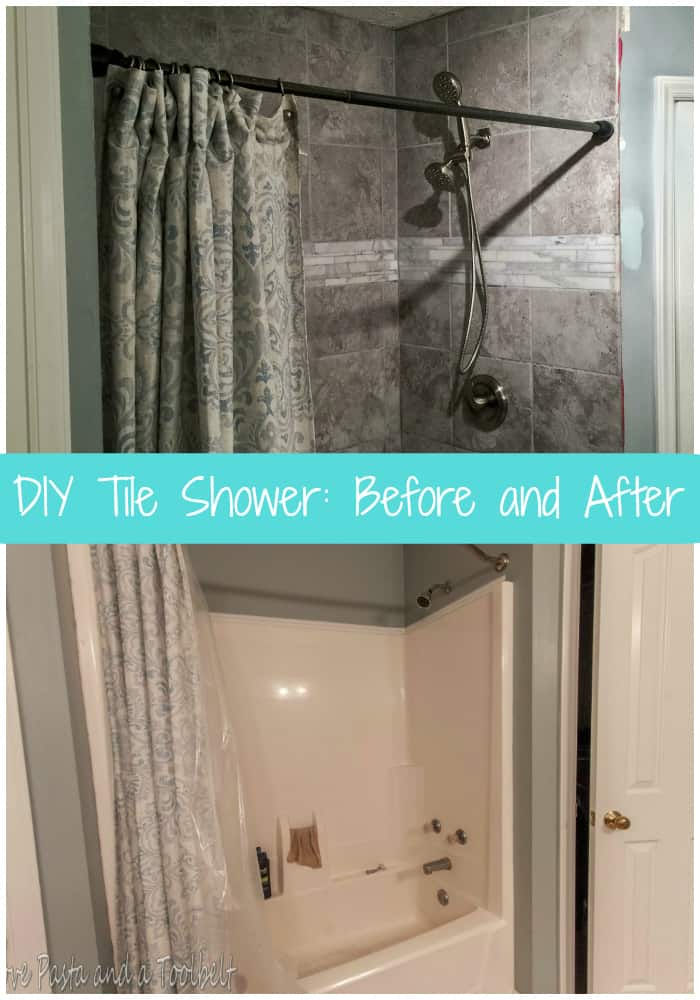
Today I am so excited to share our DIY Tile Shower: Before and After with the beautiful Moen shower head that was sent to me in exchange for this post. Even though I received free product all opinions and my love for my Moen shower head are my own!
You guys I am so excited to share today’s post with you. This project has been a long time coming. If you follow me on Instagram then you may have seen some 9 months when I posted this picture (and no it’s not a baby).
Look at us, so young and naive, thinking our shower renovation project would be finished by the end of the year. But as with any good project we hit a few bumps in the road and ended up with some weekends not as free as we had hoped. So here we are on the first of June and I can happily say the shower is DONE and usable! Oh and also, it’s amazing.
Now we may put together a little series showing step by step how this dream shower was accomplished but for now I had to share it with you and I’ll just give you the basic highlights.
Step 1: Demolition– We had a shower/tub combo that had to be ripped out, cut into pieces and hauled out to our garage. Tyler was pretty excited about the new tools he got to purchase for this project.
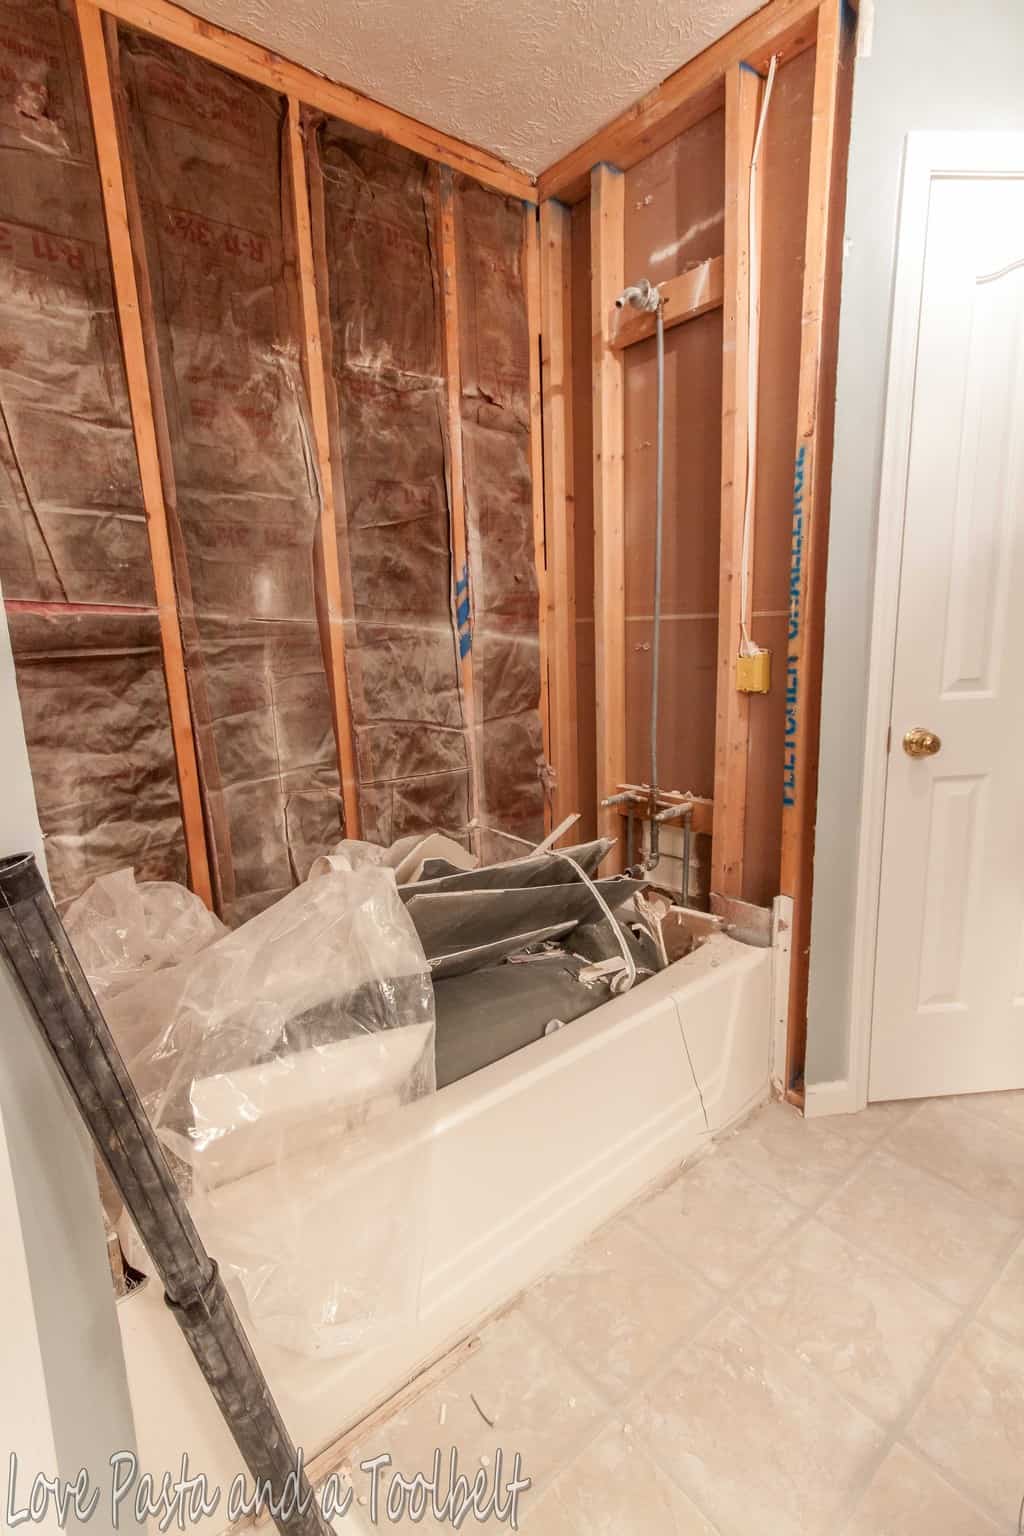
Step 2: Plumbing– This was the only part we hired out. We had to have the plumbing redone to accommodate just a shower and Tyler didn’t want to mess with the plumbing so we smartly paid a professional to do it.
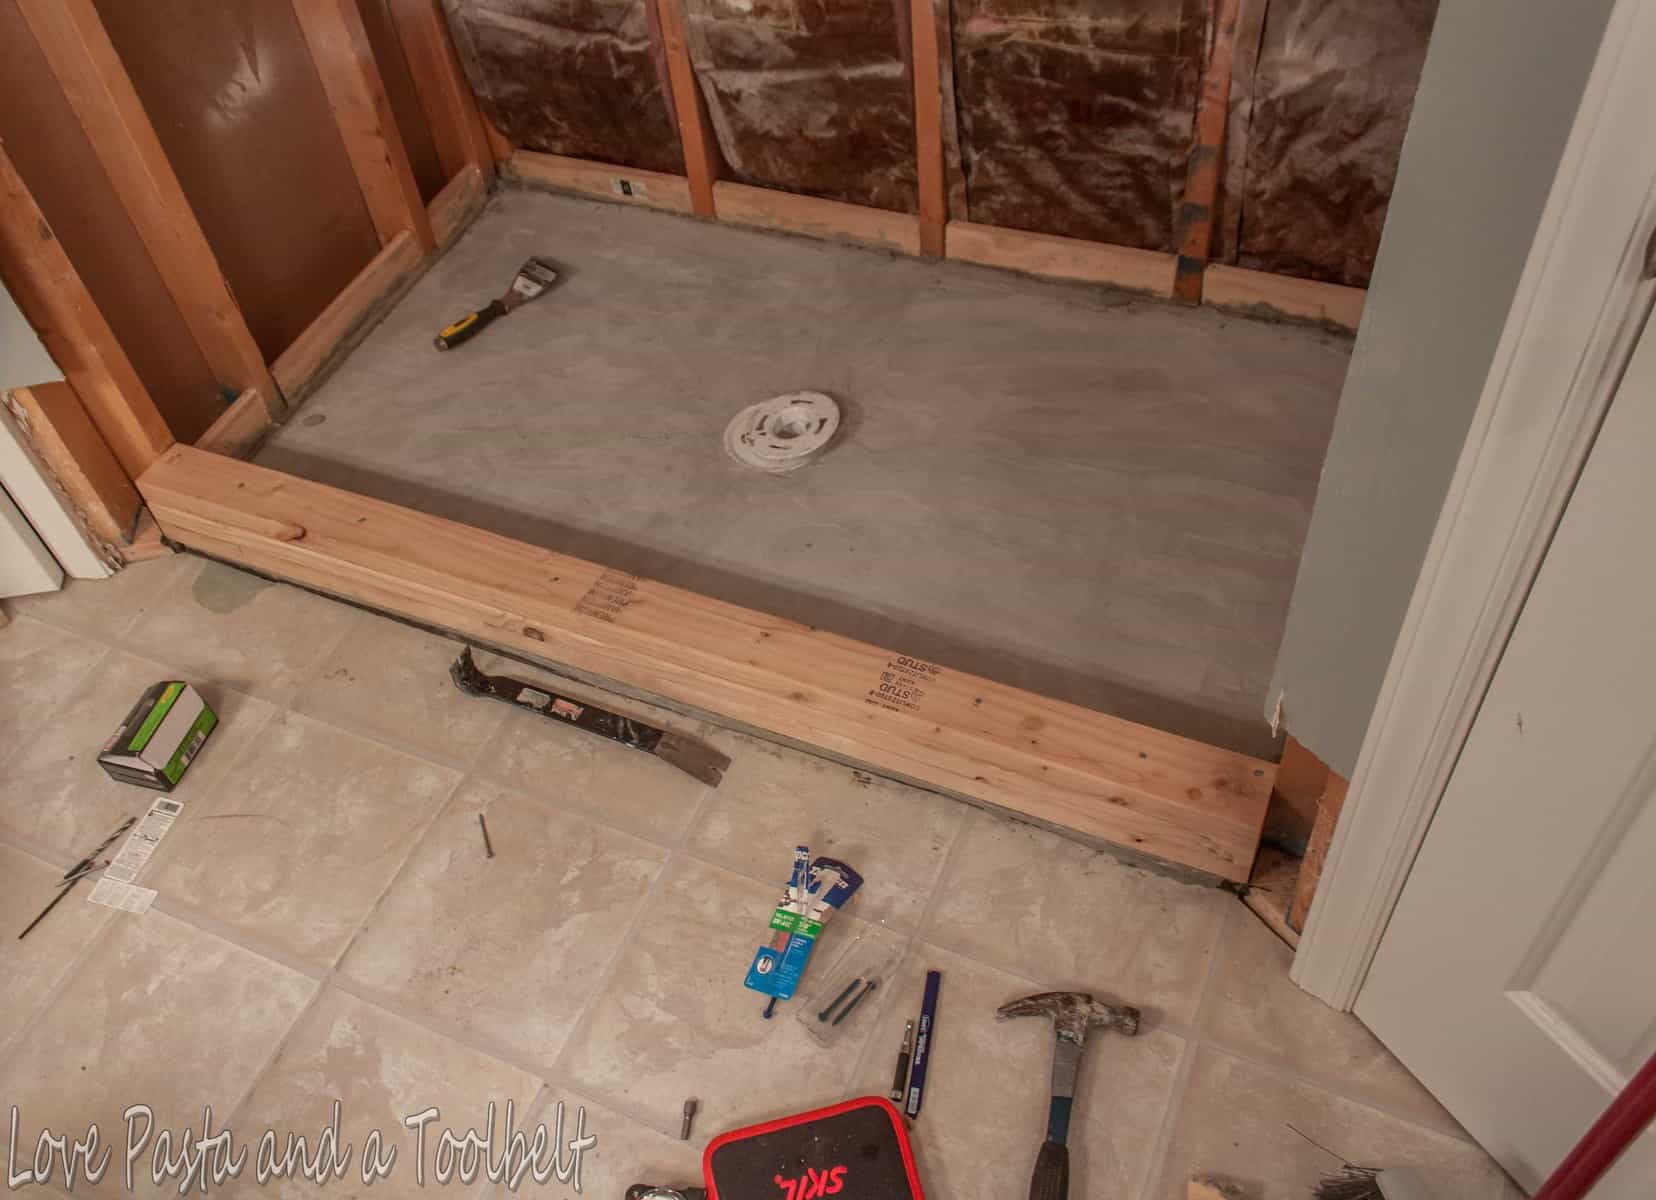
Step 3: Shower Pan and Curb– This was the part where Tyler got to mix up concrete and laid the shower pan and built the curb of the shower.
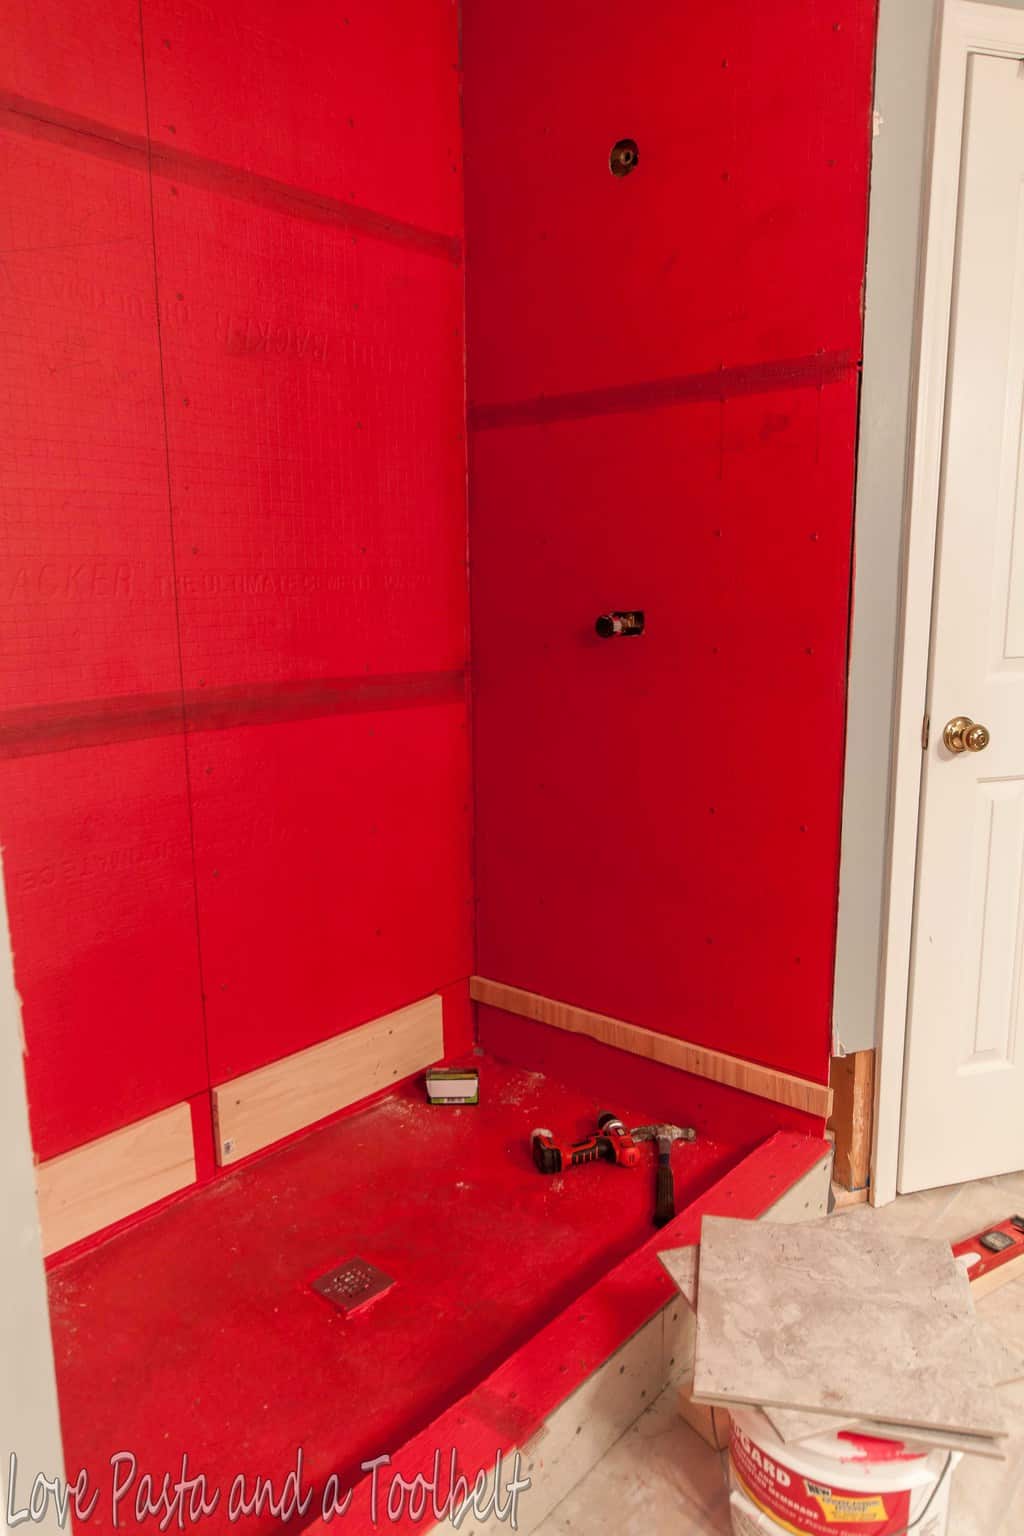
Step 4: Durock– After this step our shower finally had walls again and was not down to the studs any longer. Notice my knowledge of construction terminology, I do listen when Tyler tells me things!
Step 5: Waterproofing– This stage was fun because it turned our entire shower red and it stayed that way, for awhile.
Step 6: Tile– We finally found the time to pick out our tiles (nerve wracking) and start installing them. It was nice to go from the red waterproofer to a nice gray shower.

Step 7: Grout and Scrub– Once the tile was all laid it was time to grout! Wow what a difference it made once the grout was in. Then I came in after Tyler and scrubbed that shower more than it will probably ever be scrubbed again.
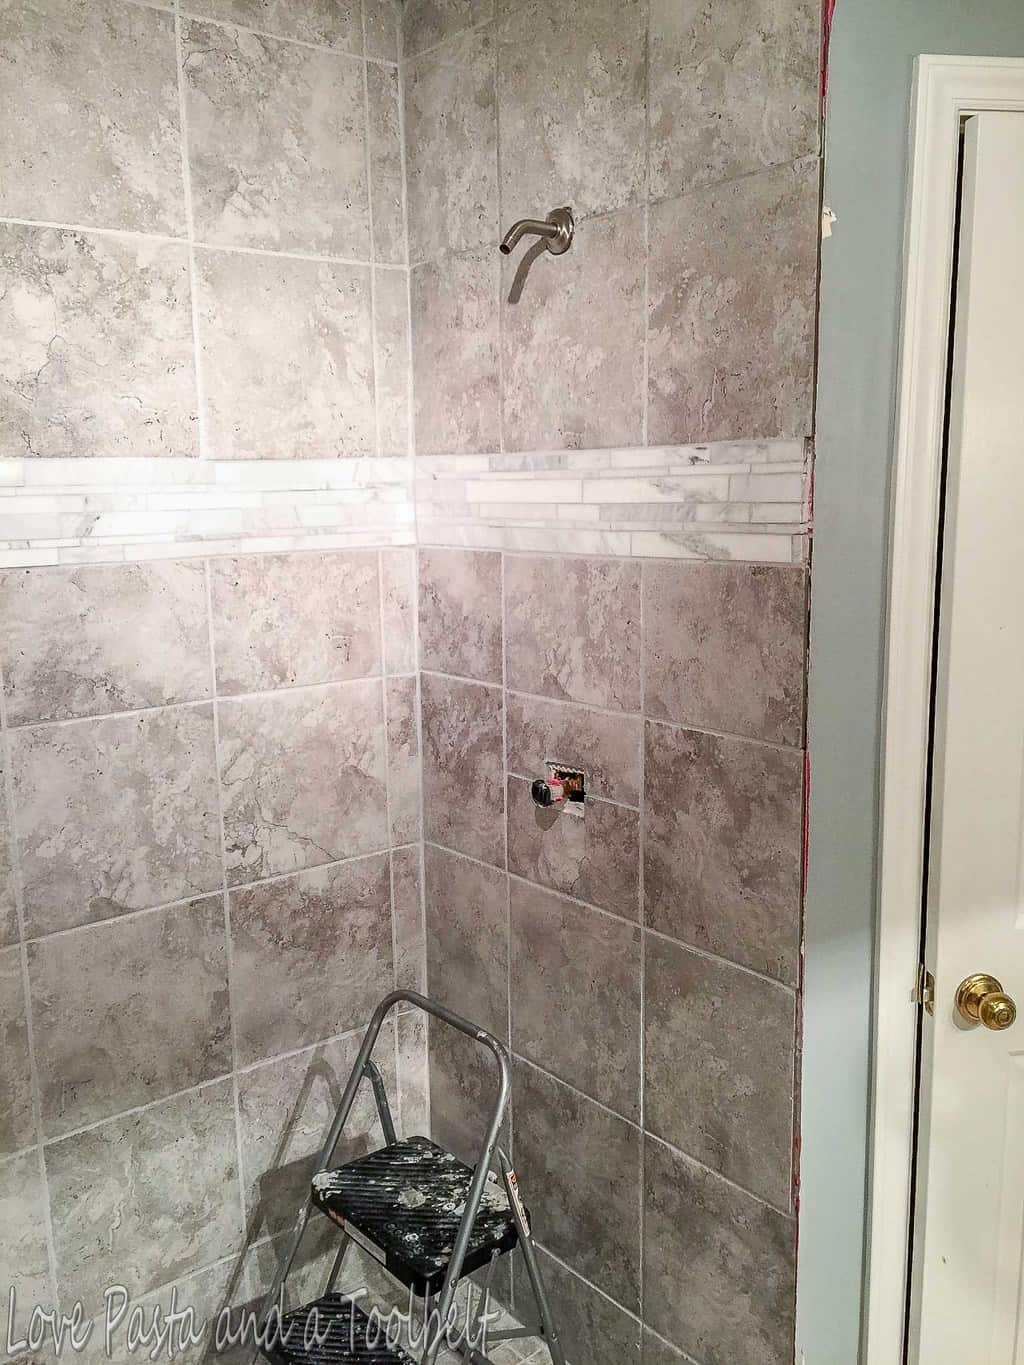
Step 8: Seal– After the grout had time to dry we sealed it. Once the seal had dried the recommended time it was time for the best part!
Step 9: Install Moen shower head– I was so excited when Moen sent me this beautiful Banbury shower head to put in the shower and tell you guys about.
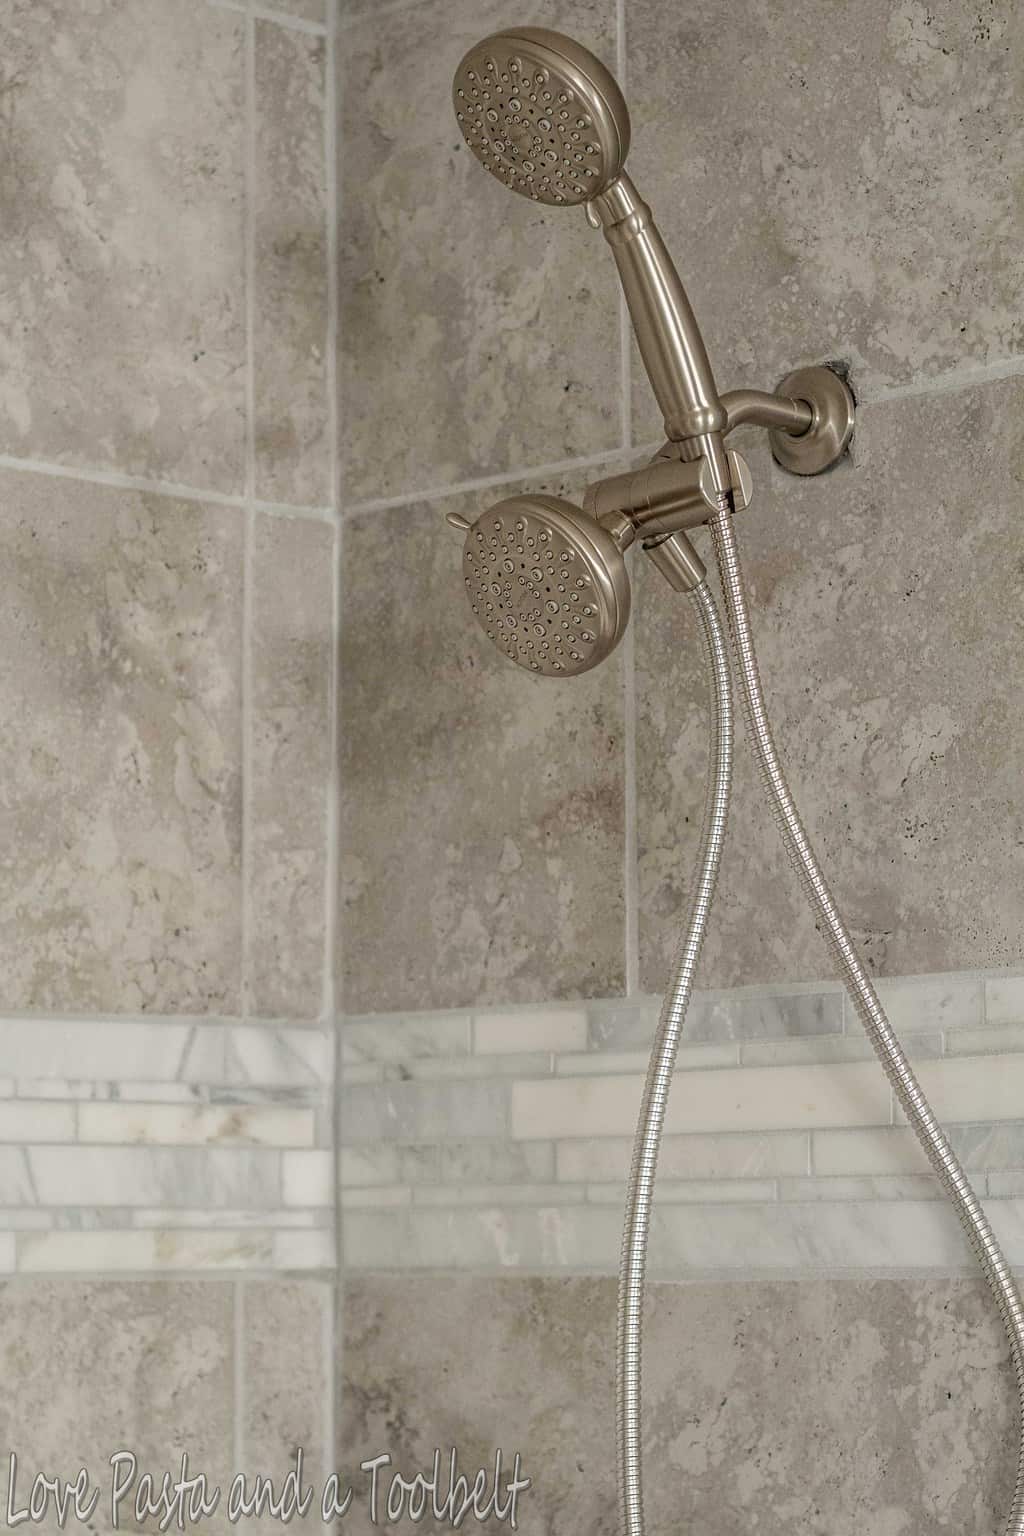
I knew I wanted a shower head with a handheld as well. It’s my dream to have a shower with multiple shower heads on both sides of the shower but reconfiguring for that was not in this budget. The Banbury shower head with a handheld that allows you to have both on at the same time (cue my excited dance) is the perfect solution! The shower head has a spot resist finish which is perfect since you don’t want to leave your fingerprints when you’re adjusting to one of the five settings it offers!
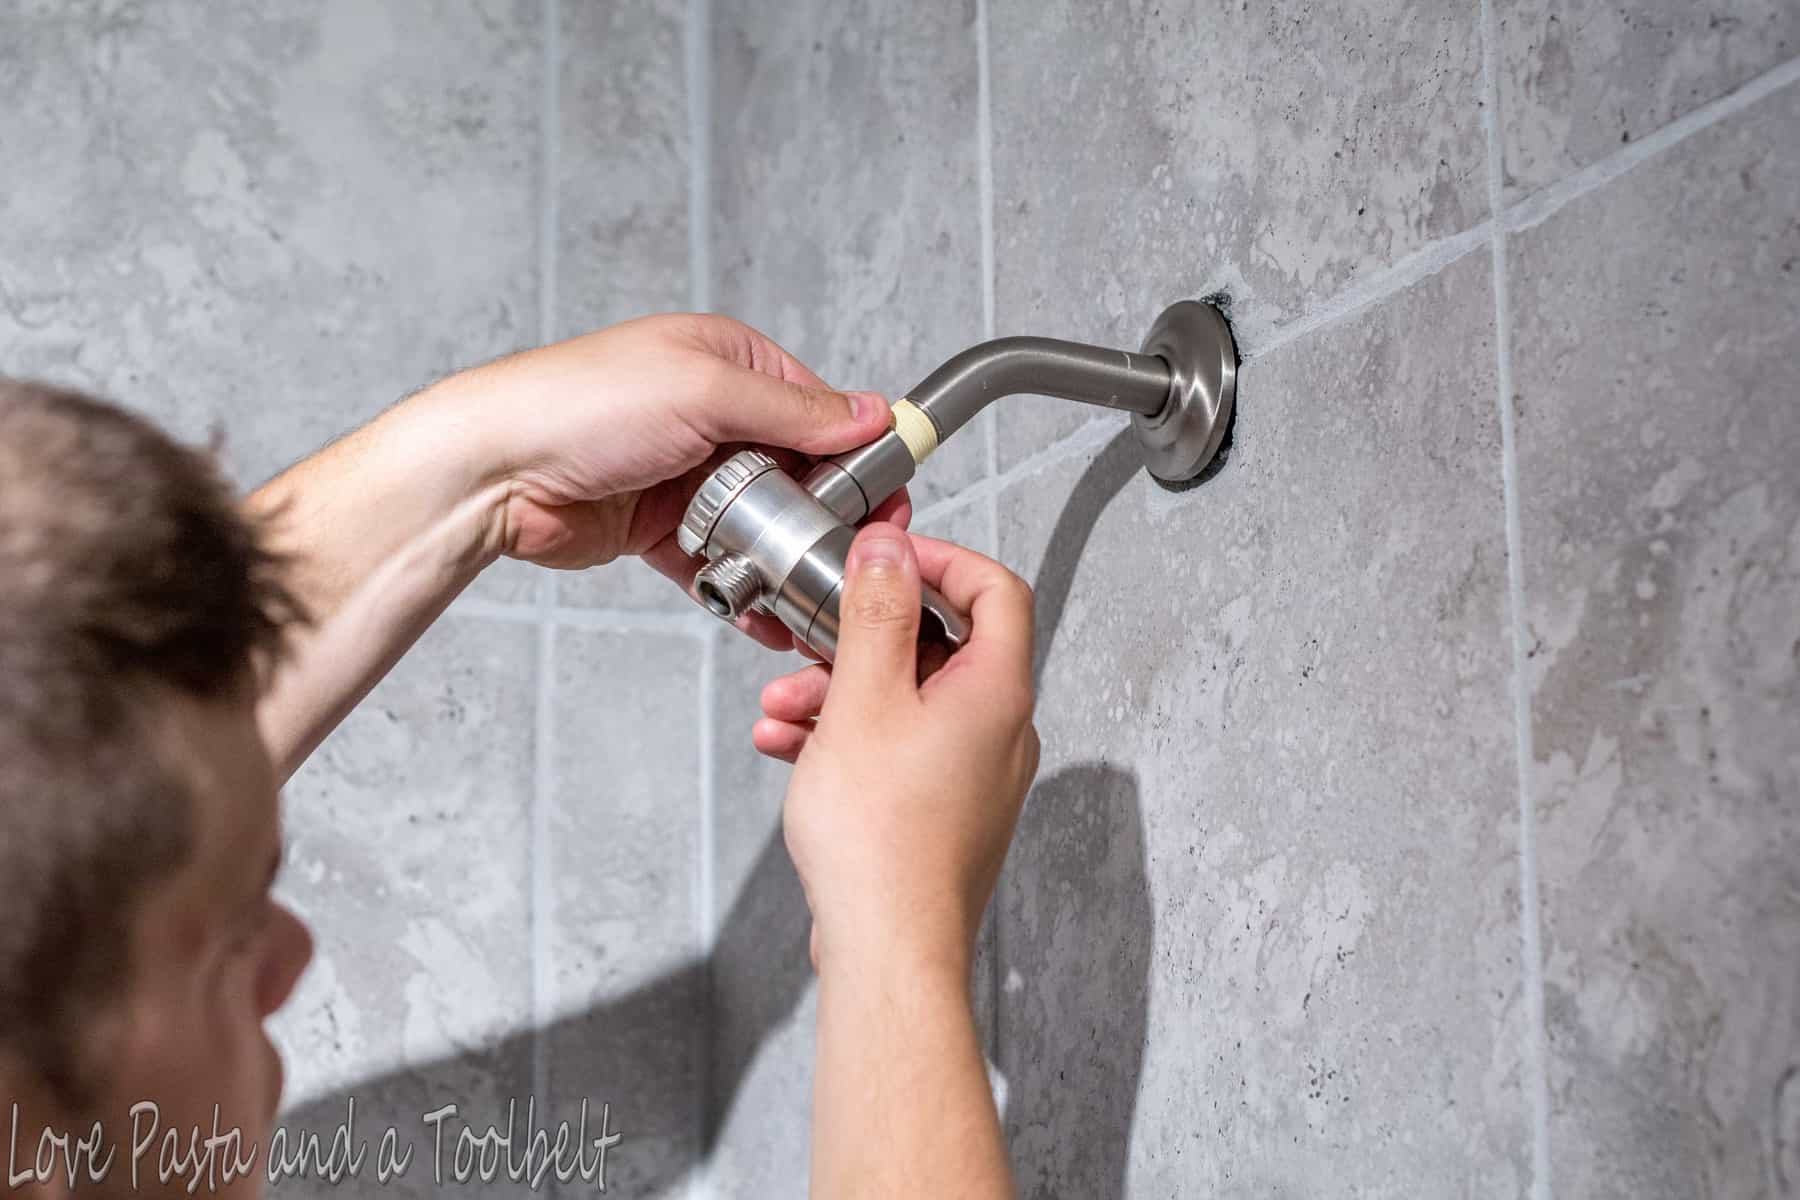
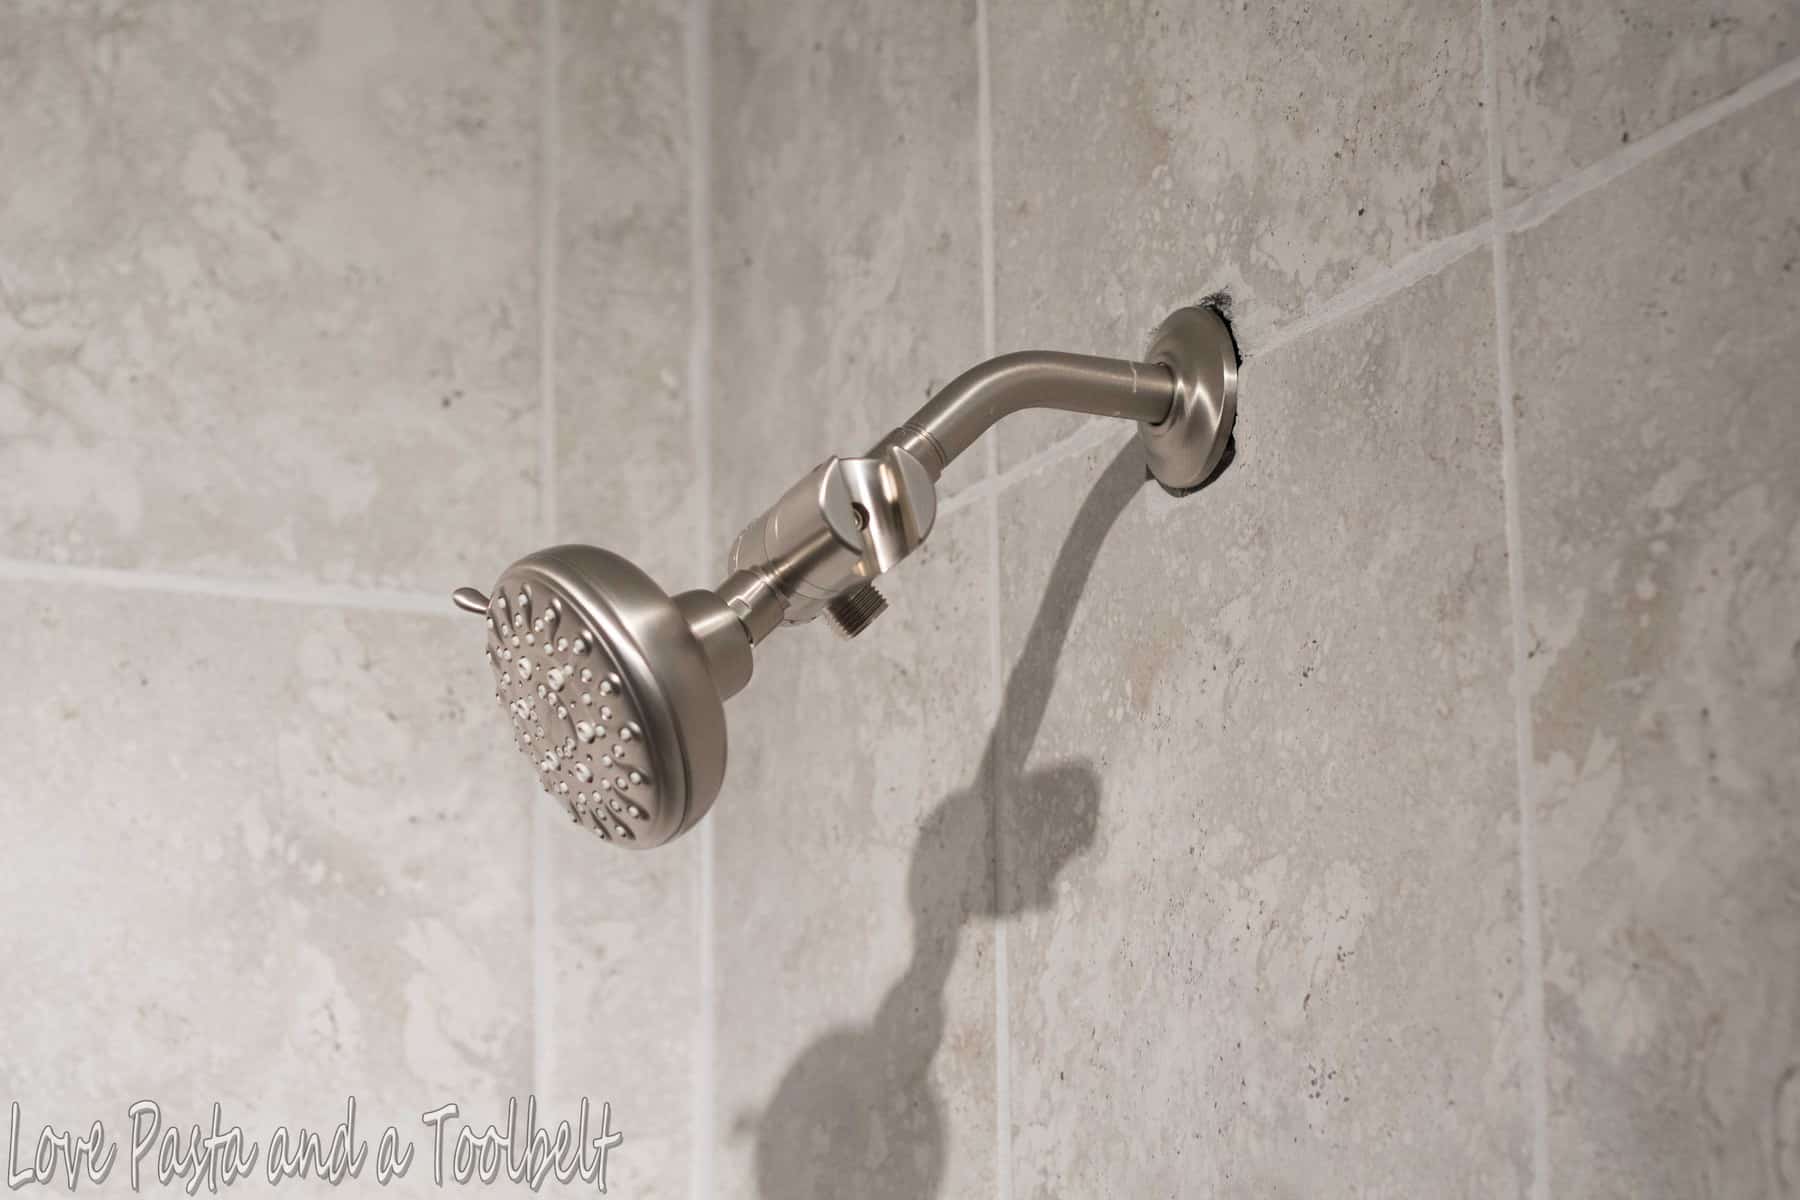
Our Moen Banbury shower head was simple to install and we have a fun video of the install for you!
You can get your own Moen Banbury shower head exclusively at Home Depot!

I am so in love with how our shower turned out! The only thing left is do order the glass door. For the time being we have a shower curtain up which works just fine.
So I want to hear, have any of you redone a shower? Are you thinking about it?

Looks wonderful!! Great job!! Love this tile!! That shower head looks wonderful and a joy to use!!
Thank you!! We love how it turned out!
Emily
Love, love, love the new look! Where did you end up getting your tiles? They look sleek! We installed all Moen at our new place. The husband insisted and I’m glad he did. The quality speaks for itself. My parents have the same Moen faucets in their house they built in 1979!!
Congratulations on your beautiful, big shower!
Thank you!! We ended up finding them at Buy Floors Direct. I love them and how it turned out! And we love our Moen shower head!! It’s a great choice!
Emily
We dont have a buy floors direct in Portland Oregon. Do you remember the manufacturer and tile name? Your choices are really nice.
Hi Karin,
Sorry to take so long getting back to you but I found the info for you! The product name is Pietra-Argento. That’s the only info I have on it.
Thank you!
Emily
I love the instagram photo of you and Tyler! It’s cracking me up. haha And the shower looks AH-MAZING! I’m so happy it’s finally done and useable! I cannot wait to see pictures of the entire bathroom once it’s done. 😉
Thank you! I am so so glad it is done to!!
Emily
Wow! This looks amazing!!! It was well worth the wait! Great job!!!
Thank you! We just love how it turned out!
Emily
That looks fantastic! Congrats on the new look!
Thank you! We are excited about it!
Emily
Looks awesome!! I love the grey tile you picked out. Super sharp. 🙂
Thank you! I love it too!
Emily
Great diy tutorial!
Thank you!
Emily
What a gorgeous remodel! We want to do something similar in both of the bathrooms in our house, but haven’t gotten the time (and courage up) yet. I’ve tiled before (on the floor), but never on the walls–I think I’d be more nervous about tiling on the walls!
Thank you! I was quite proud of my husband for tiling the walls! It turned out better than we could have hoped for!
Emily
Nice job. We just had our bathroom renovated this year too. Yours turned out really pretty. I love the color scheme too.
Thank you! We love how it turned out!
Emily
I haven’t undertaken a shower remodel but I totally love how yours turned out!
Thank you! It’s no easy task but well worth the results!
Emily
Your shower looks amazing! I love it!
Thank you Britney!
Emily
It looks amazing, we’ve tried it once and failed ha ha but at least we tried!
Oh no! It turned out a lot better than we were expecting haha!
Emily
WoW!!! What a great transformation. Great job.
Thank you Barb! We love how it turned out.
Emily
I’m still an apartment dweller, so I can only dream of the days (weeks, months, dare I say years) that I will get to remodel lol. I applaud y’all on this job, it is terrifically done and soooo beautiful! That shower head is the bomb! Go Moen! Lol
Thank you! We just love how it turned out. It’s so fun to have your own house to remodel, I’m sure you’ll have fun once you get one!
Emily
Your shower looks amazing! We are getting ready to install 2 new bathrooms and a backsplash in the kitchen so I have a feeling I am going to develop a love hate relationship with tile.
Thank you!! Good luck with your installs!
Emily
We recently remodeled our master shower also … And believe me I know about delays and thinking it will take only a few weekends… Ah the trials of home ownership. It looks awesome! Congrats!
Thank you! We love how it turned out!!
Emily
This is awesome! I love that you were brave enough to tackle it on your own. I really want to try this out with our new house. Looks like a great project and I love how it turned out. Looks amazing!
Thank you! Credit must be given to my wonderful husband. He worked so hard!
Emily
Great before and after! Your tile looks amazing!
Thanks Cathy! We love it!
Emily
Wow… this looks amazing! Well done!
Thank you so much!
Emily
What a transformation! WOW! Great makeover and really makes a big difference! Thanks for sharing!
Thank you Joanne!
Emily
I love how it turned out! so pretty!
Thank you! We love how it turned out too!
Emily
That looks amazing. You did a great job. I have tiled floors and backsplashes but for some reason a shower seems a little to scary!
Thank you so much Britni!
Emily
Congrats! You did a fantastic job!
Any chance you guys are available for hire? Just kidding. No, but seriously… lol
Thank you!! Haha I think this may be the first and last time we tile.
Emily
You did a great job! Love the tile!
Thank you Kendra!
Emily
Wow, this is beautiful! We’re moving into our first home next month and this definitely inspired some DIY in me 😉 Wonderful job! #PeonyProjectLove
Thank you Vanessa! Good luck with your new home!
Emily
Oh so pretty! The Hubs and I want to learn to do tile work…but it seems so daunting. Maybe it’s not as scary as I think it is.
It is a bit daunting but we were so pleased with the results and spent half what we were quoted to have it done!
Emily
You go girl! The shower looks great! Love the tones of the tile!
Thank you Rebecca!
Emily
What did it run to have plumbing done?
Hi Lora,
I’m really not sure and it would vary from bathroom to bathroom. We got a quote and made sure it was within our budget. Fortunately it did and wasn’t too much and worked out for us!
Emily